


While visiting Rhode Island we saw a really neat garden ornament. It was a mushroom, and made of plastic. My Mother-in-law liked it, and I liked it too. After we got home, I decided to try to make one for her. Drawing on my previous experience with ferrocement I set out on the project detailed below.
The first thing in any project is to figure out what you want to accomplish. I wanted to make a very durable mushroom, that also looked nice, and was about the right height to sit on. Looking around the internet, I found a few pictures of mushrooms, but eventually decided to base it on the picture we took of the original plastic garden ornament. I was shooting for a height of around two feet.
Next, I made a 3D model of the mushroom. This was the easiest part for me. I love making models on the computer, and here I got to play around with the internal structure, proportions, etc. All of the design decisions took place at this stage.
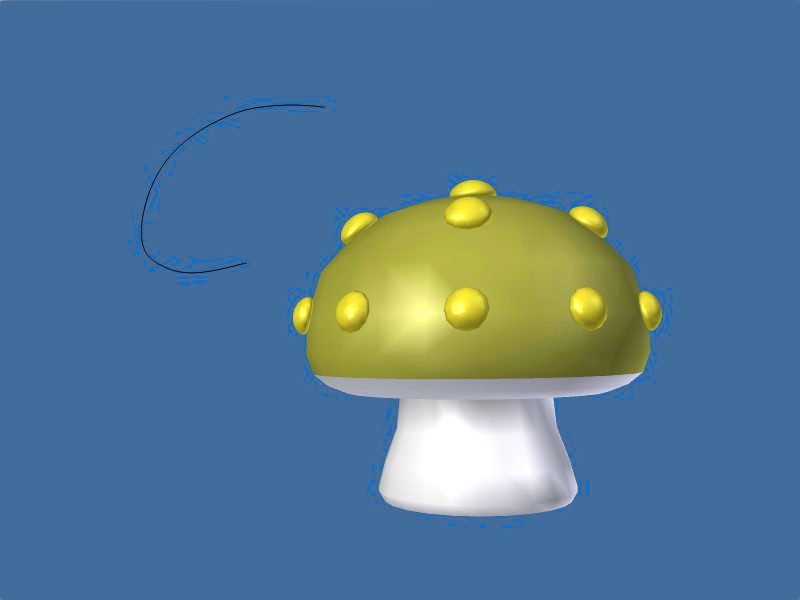
What I was especially looking for here was a workable structure. The point is to make this thing both look cute, and be really tough. I settled on a five ribbed design, linked by four rings. By itself, the welded re-bar would be pretty tough; With the wire mesh and concrete, it could probably survive getting run over by a truck. I wouldn't try it though; It would probably wreck the truck.
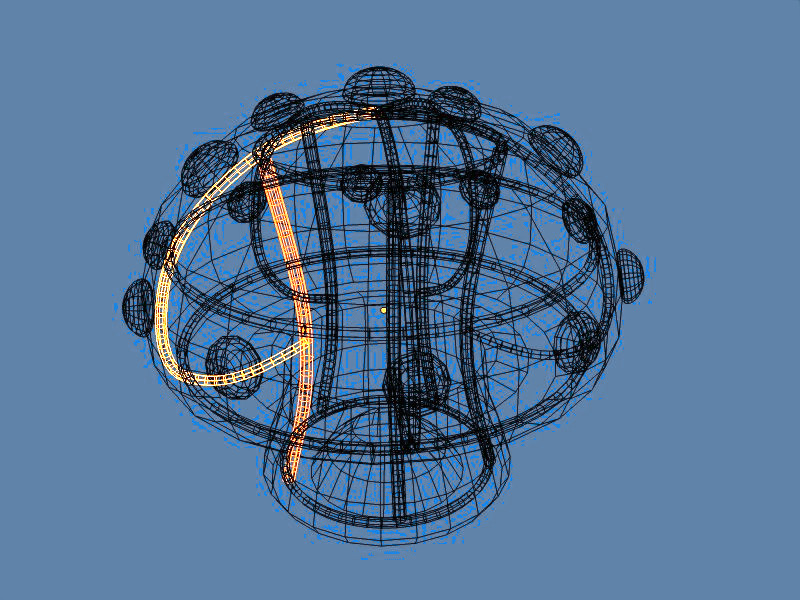
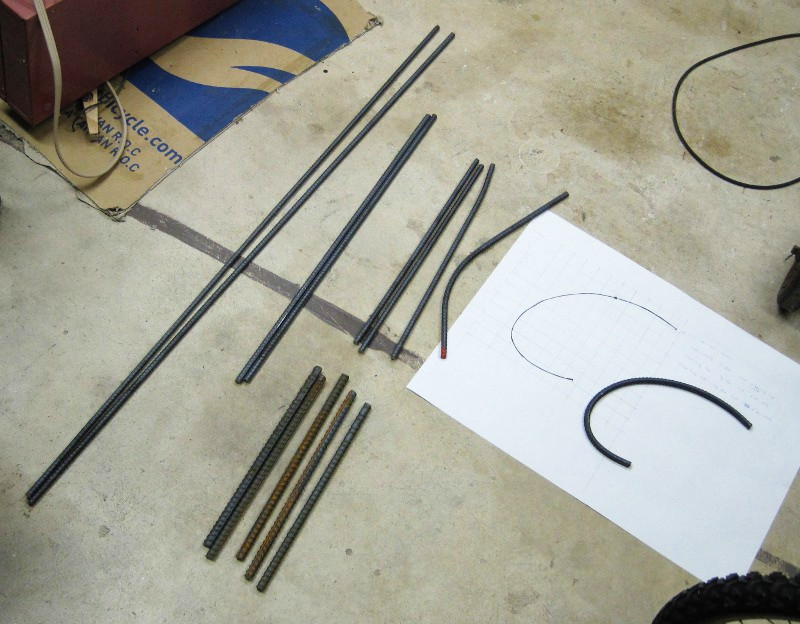
The 3D model gave me a good idea of the length of the re-bar, so getting that right was easy. I cut the re-bar with a sawsall hacksaw blade. Here are the cut lengths laid out. The thick ones are for the stalk.
I carefully transfered the rib curves from the computer to a piece of paper using a grid. This makes a kind of template, and ensures that the ribs are (mostly) uniform. Consistency is important for symmetry, which in turn is important for cuteness!
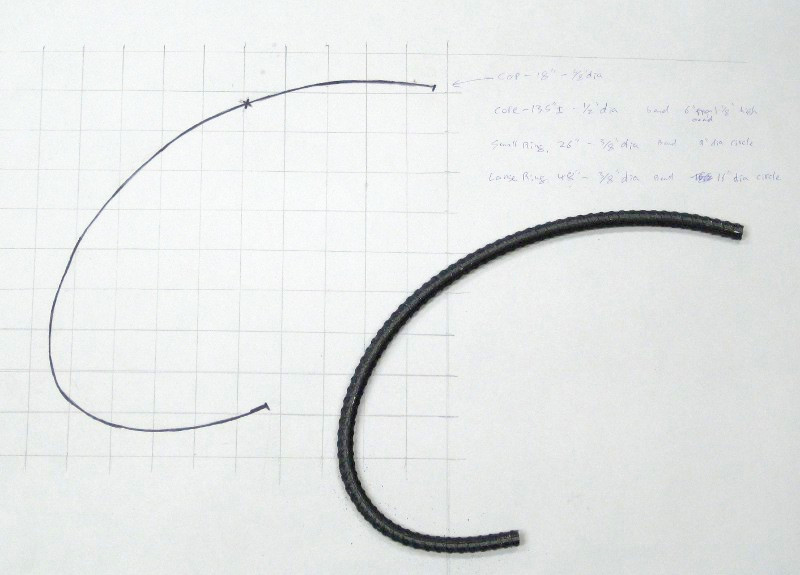
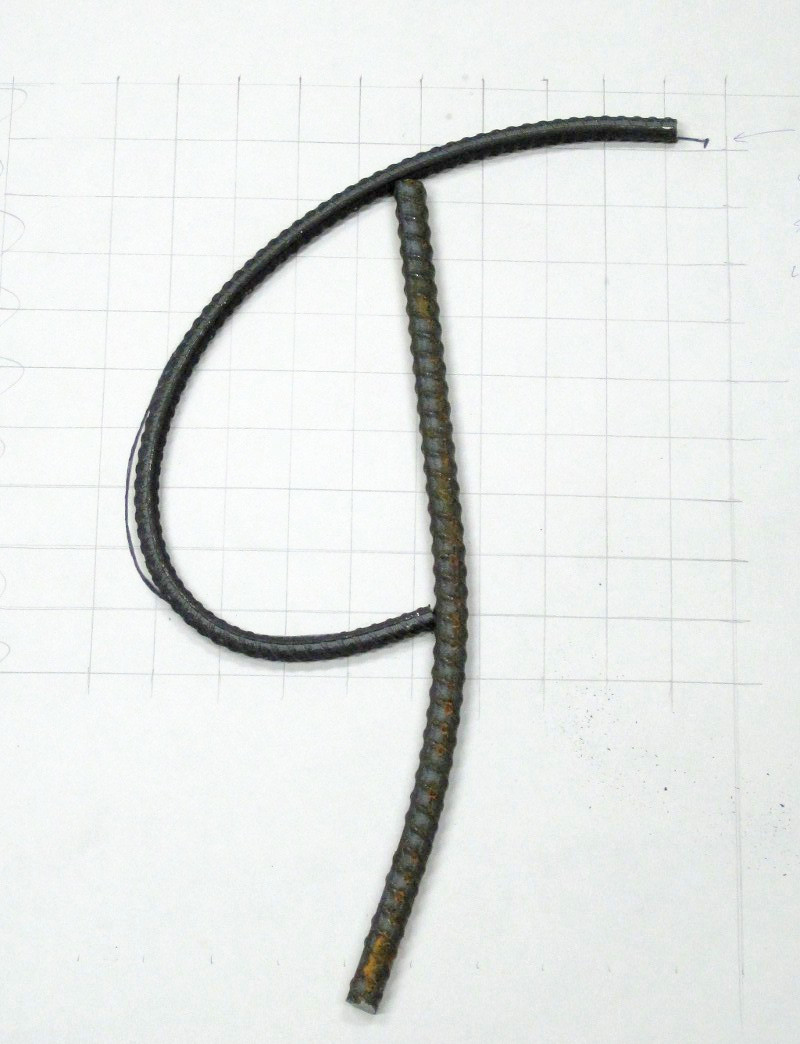
Here you can see a matching rib. The center post will stick out the bottom as the mushroom stalk. It continues all the way to the top to lend the structure more strength. You can see that the bent rib doesn't quite match the goal, but it's close enough. I bent the re-bar using a vice and a long pipe.
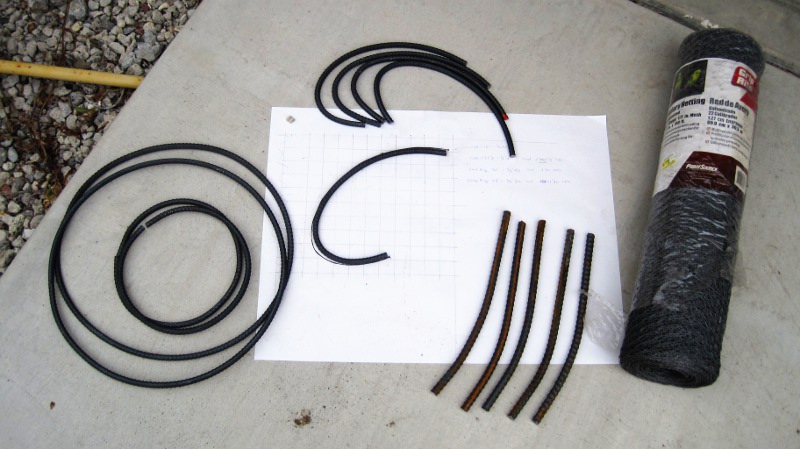
Here's all of the material bent before welding, including the four re-bar rings and the half inch chicken wire. I had a hard time finding the fine mesh chicken wire, but the local feed store had some. It's a lot easier to work with than the one inch stuff when doing ferrocement. With one inch chicken wire, the concrete wants to fall through the holes, but the half inch wire grips it fairly well.
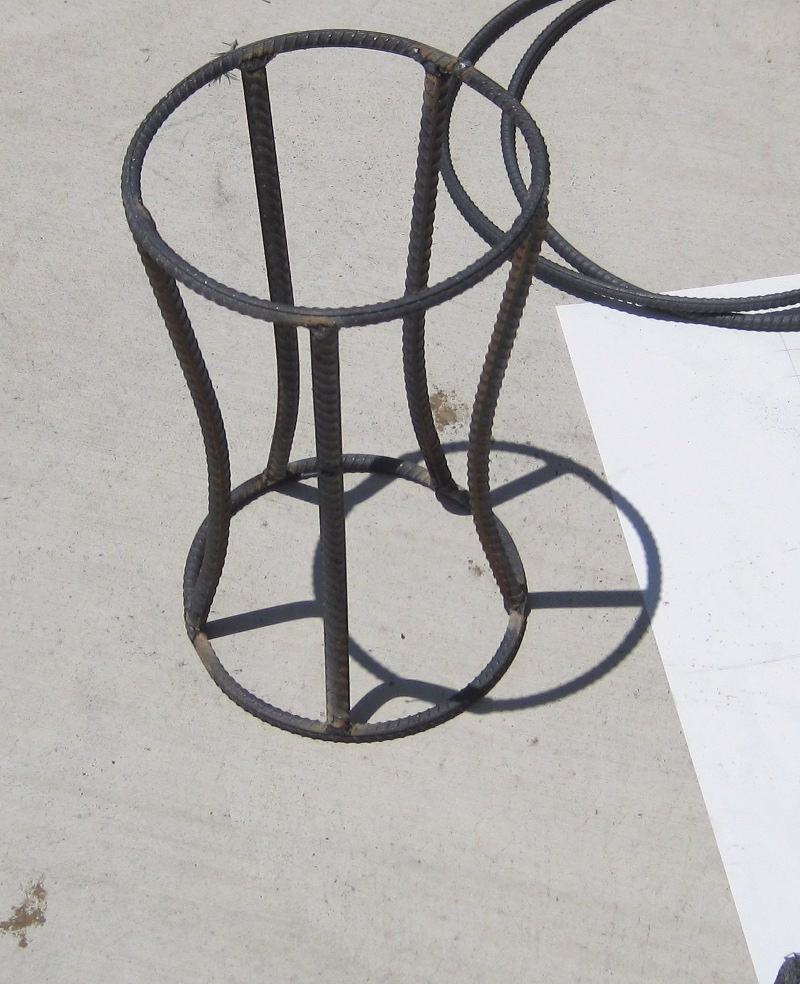
Once the re-bar was cut and bent, it's time to start welding! I initially thought I should weld all of the ribs individually first. However, by welding the core first I was able to easily mesh the core. It would have been much harder to do if the cap bars were in place. Here is the completed core.
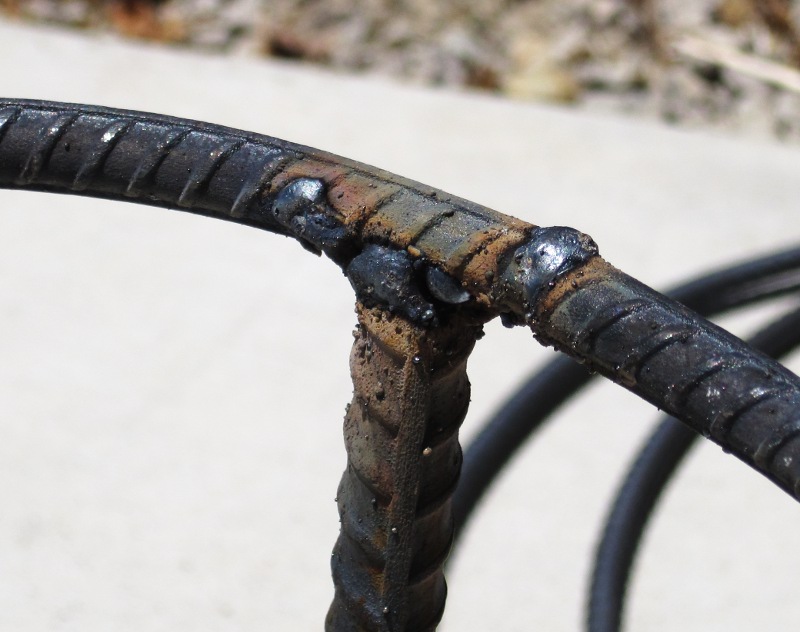
Here's a closeup of a typical weld. I tried to get decent joints fused on both sides. Not much worry about perfection here, the main idea is fusion. I was using a Hobart MIG welder (Who names their welder "Hobart?") with flux core wire. It works well for imprecise stuff like this, and more importantly it's the only welder I have access to. On the right side is the weld that joins the top ring. I used an old pair of vice-grips to hold the pieces in place while I tacked them; Then I took the grips off and did the complete welds. Even though they were just there for the tacks, those vice-grips are spattered with little globules. Word of advice, don't weld in sandals. (I all this welding in sandals, ouch!)
Here you can see why I wanted to do the core first. Putting the chicken wire on would have been so much harder if the lobes were welded first. At this point the lobe ribs haven't been welded yet. I fiddled around with them trying to figure out the best way to put them together, since they are all slightly different. When I got it to stay like this I numbered each one and marked where they touched the ring with a marker. That way it all went back together the same. I'd hate to weld three on, only to find out that the last two didn't fit!
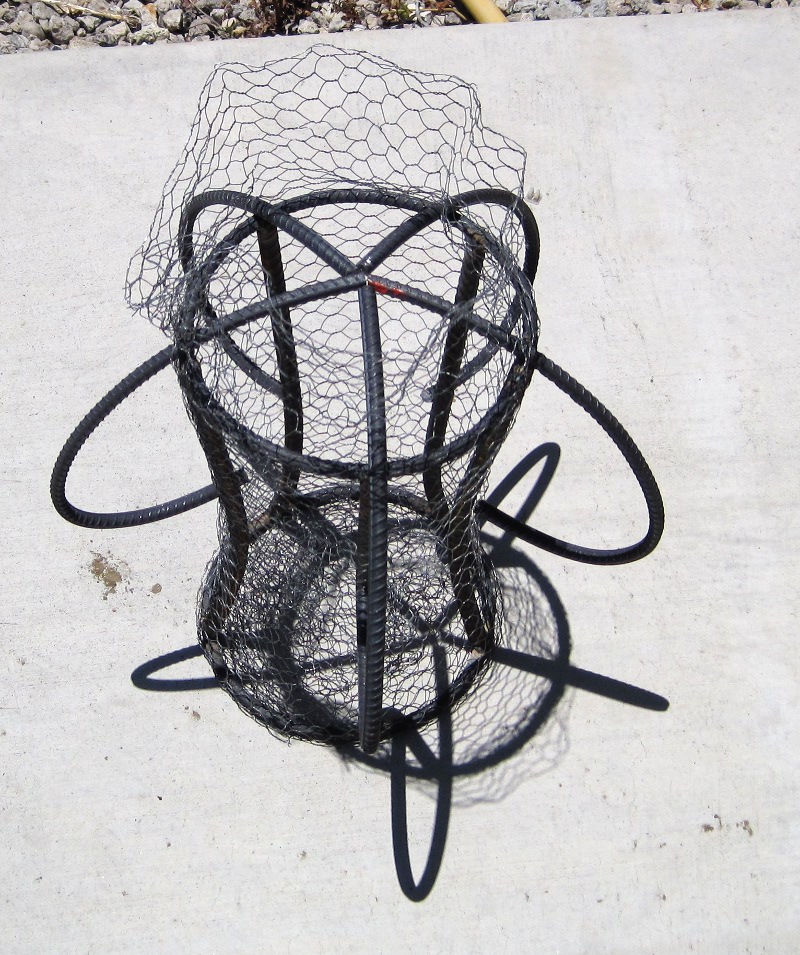
Okay. So once the wire was in I wanted to stuff the core with newspaper. The newspaper supports the concrete from the inside so it doesn't push all the way through. Why not put it on now, right? Unfortunately, I forgot how hot welding is. It actually melts and vaporizes metal! So yeah, the newspaper burst into flames.
Oh well... This is why you weld on gravel far away from combustible materials.
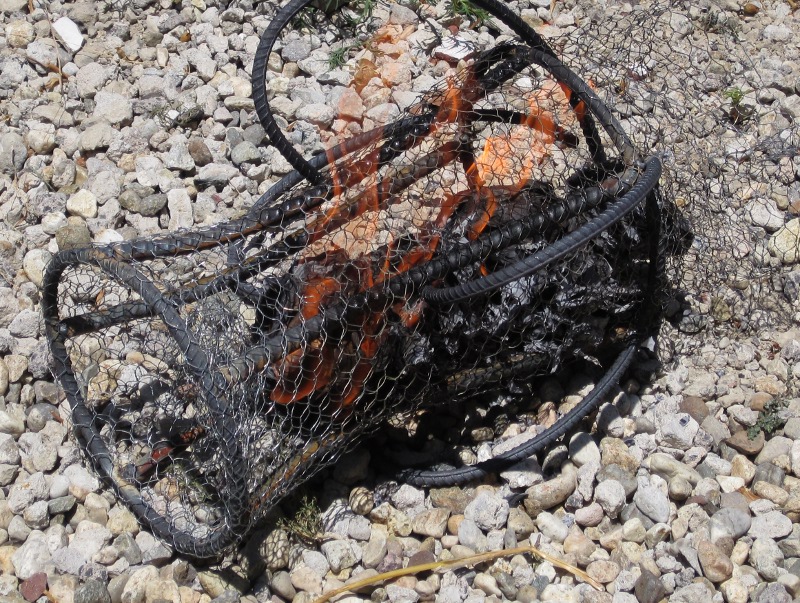
So, after the incendiary interlude, I welded on the rest of the lobes without any more trouble.
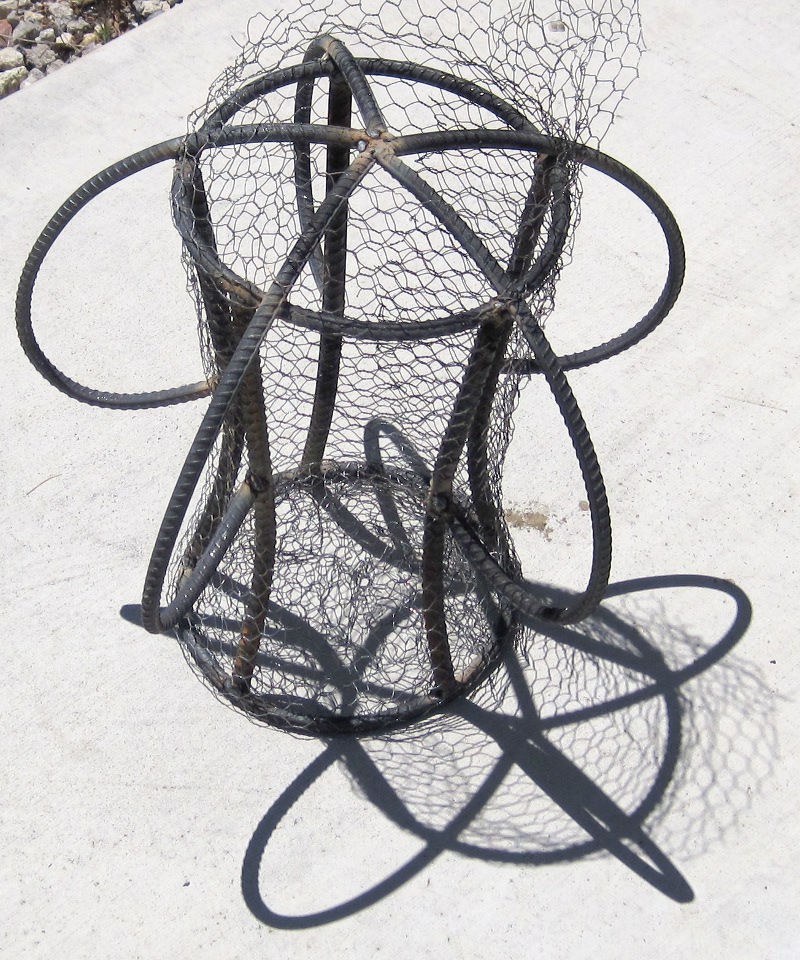
The armature is complete! Here the outer rings have been welded on, and the chicken wire trimmed to length. The rings really help to stiffen the armature, and will give the cap a much more regular shape. You can see how they are inside the ribs; To do this, I waited to weld the rings closed until after they were in place. It made it a lot easier.
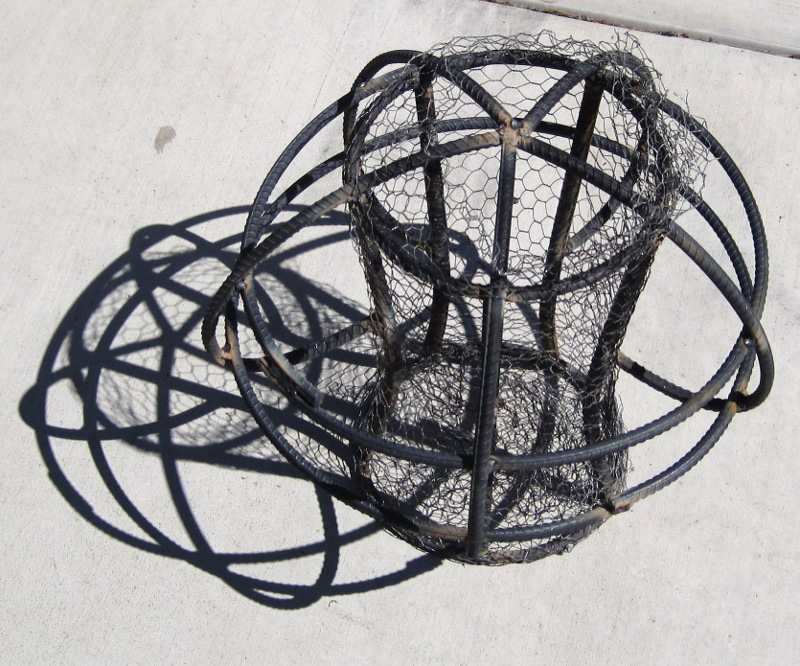
This means it's time for the nearly endless process of attaching the...
If it was just re-bar and cement, like a house foundation, we would be ready to start. However, ferrocement relies on a skin of dense wire mesh to keep the concrete in place while it sets. The concrete will be applied in a relatively thin sheet onto the wire mesh. Once the concrete is set up, the wire will help to reinforce it and hold it together in the case of impact or abuse. To keep the concrete from pushing all the way though, I've stuffed the core with newspaper. The bottom of the core is left intentionally open. It will be solid concrete, to lower the center of gravity.
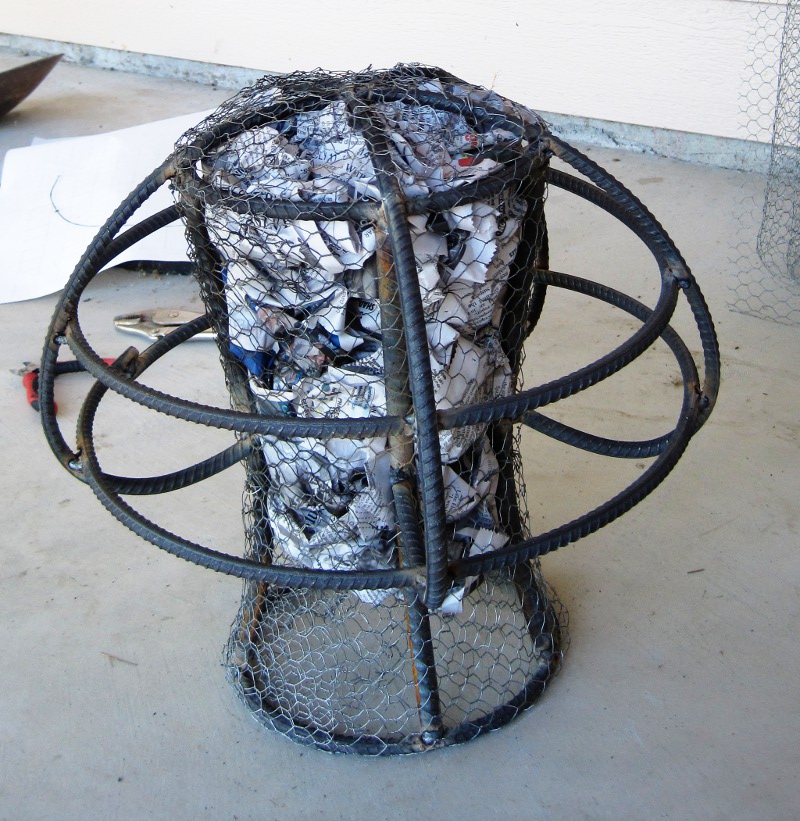
Next I put mesh on the lobes. This was rather tricky, since the wire tends to form sheets, and the cap is very curved. I did it by spreading the mesh apart around the rim, and gathering it together near the core. The hexagonal form allows you to pinch or stretch it as needed, something that is much harder with square wire mesh. Chicken wire is significantly more costly, but I think it's worth it.
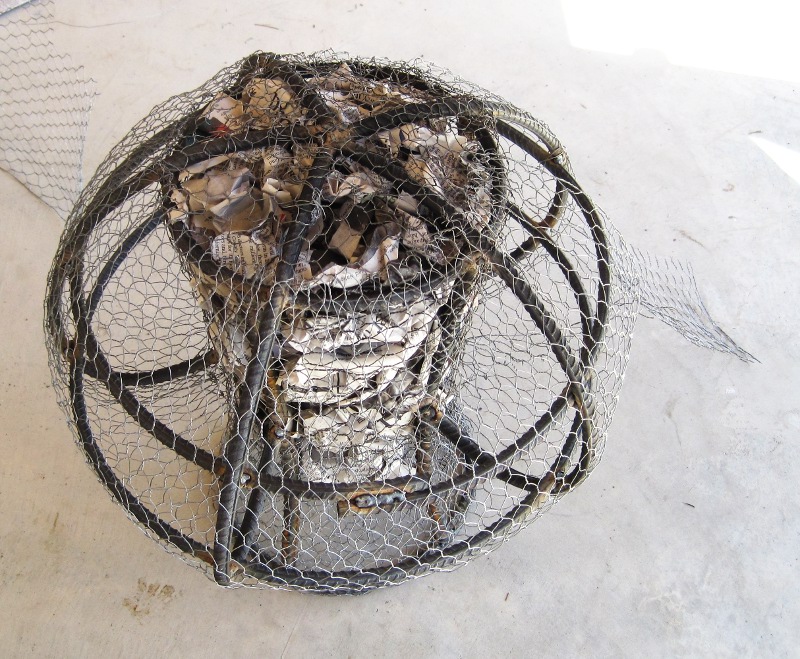
I left a smallish door open in the cap. This is to allow access to the core. I'll put the concrete on the core beneath the cap, then stuff the cap with newspaper and close the door. Once the concrete goes on, I'll want to pause as infrequently as possible, since bonds between new and old cement are generally weaker the longer you wait. I could have just stuffed the cap at this point, but the concrete on the core will add strength. Un-needed strength? Probably. Totally awesome? Yes.
Later I added another flap that runs around the rim, just for some extra strength. You can see it in the later pictures.
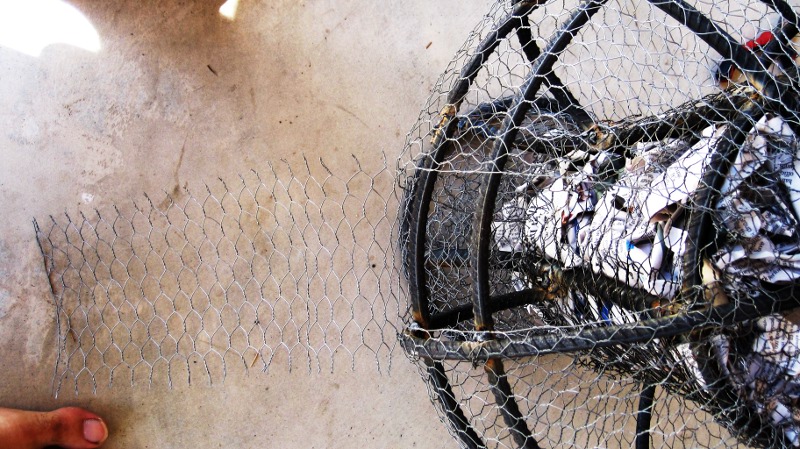
At this point the framework is ready for the concrete!
Here's my basic setup for... Putting on the concrete? I think it's called plastering. Anyway, I have a piece of plywood to set the framework on to keep the drippings off the driveway and a mixing trough to hold the concrete.
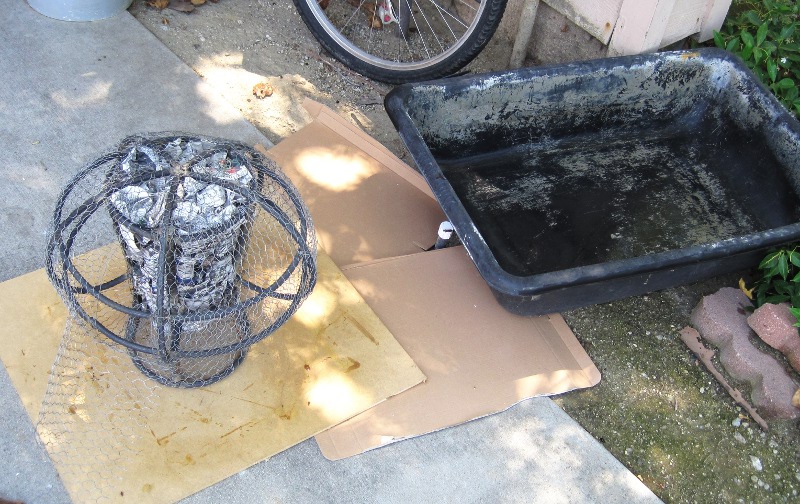
I prefer to use my hands to put the mud on (mud is slang for wet concrete mix, I think). Gloves are essential of course. I used thin latex gloves, but more heavy-duty would have been better. Probably went through eight pair all told, and I double them up since the outer layer tends to get torn easily.
Here I put the mud around the core that is obstructed by the mushroom cap. I kind of just slapped it on there. It doesn't need to look nice, just be sturdy.
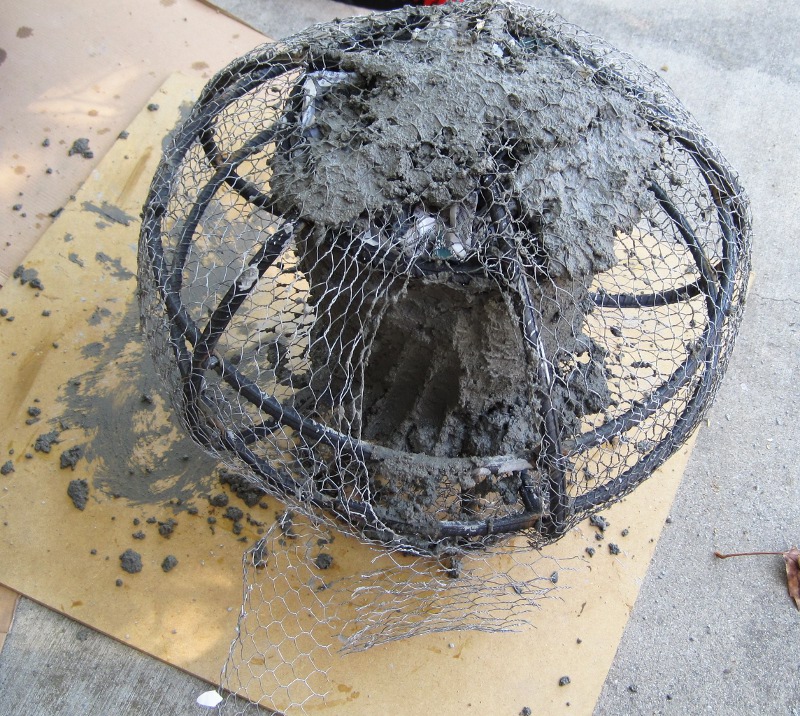
You can clearly see the two flaps on the side where I put my hand in. Right after I took this picture I started stuffing with newspaper.
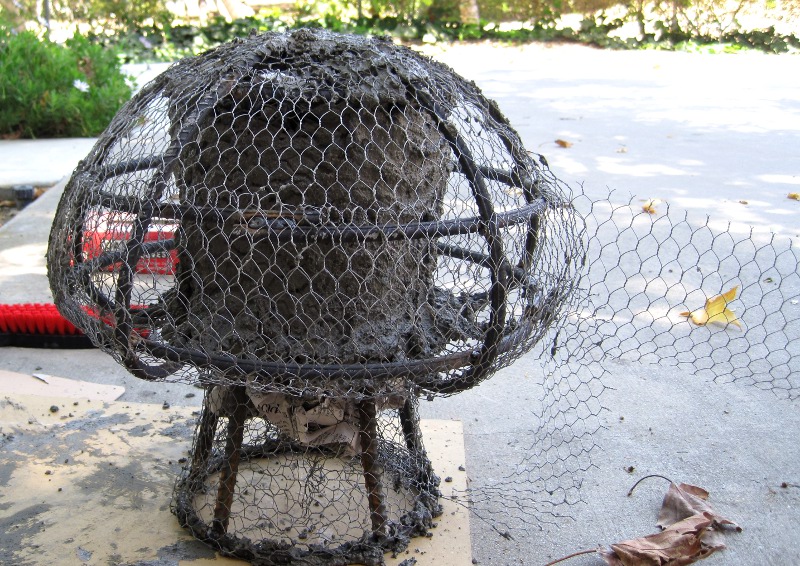
I stuffed the cap with newspaper and closed up the door, but didn't take a picture of it.
Here you can see the cap stuffed with newspaper. I didn't stuff the lower part of the stalk, which means that it's going to be solid concrete. This moves the center of gravity down, and makes the whole thing more stable. In actuality, it probably only just offsets all the concrete I put further up in the core.
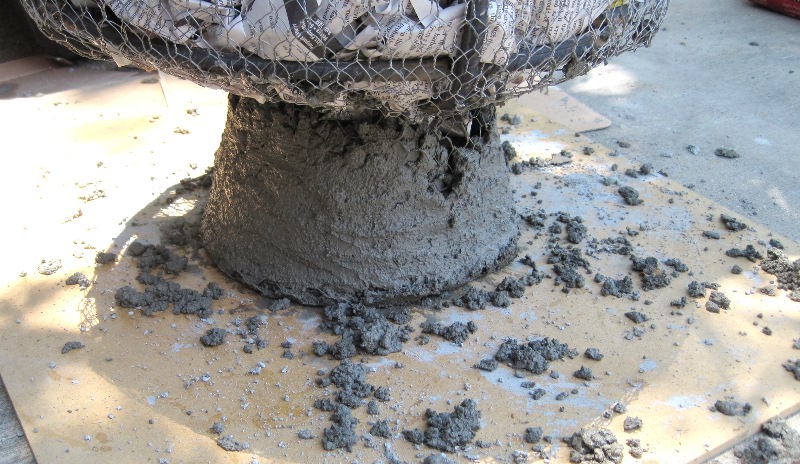
I made the bottom of the stalk cupped. If it was flat, the mushroom could wobble. It's a minor quibble, but as long as we're doing something, may as well do it right! It also looks neat, so there's that. You can see the wire is exposed along the bottom edge. I built that area up later, but didn't take a picture of it.
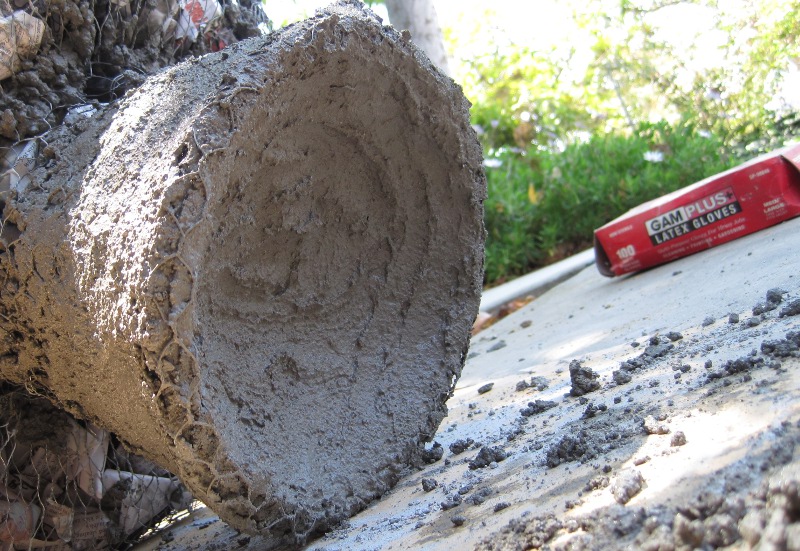
Started putting mud on the cap. It's really important to get the right consistency. Too much water and it will drip right out, too little and it won't set up properly.
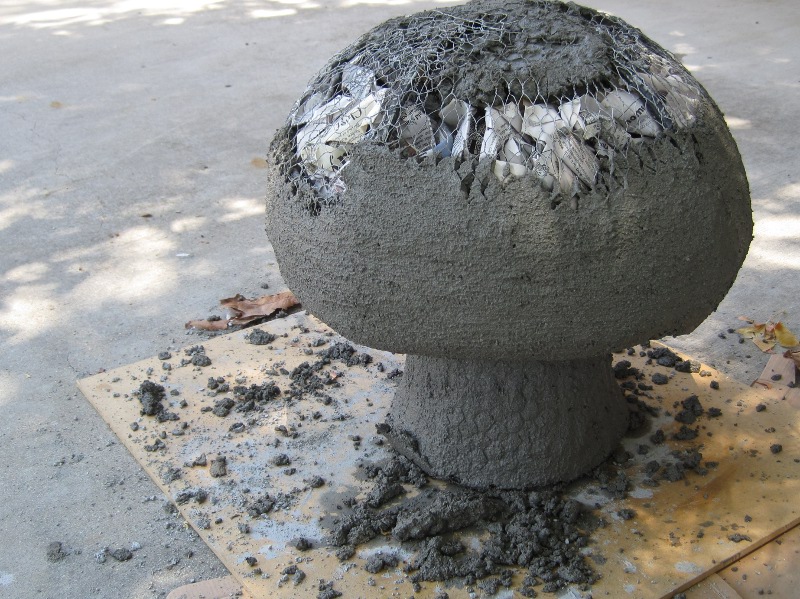
Added some ridges to the outside of the stalk. I'll re-do these a bit later, as well as fixing the lower edge.
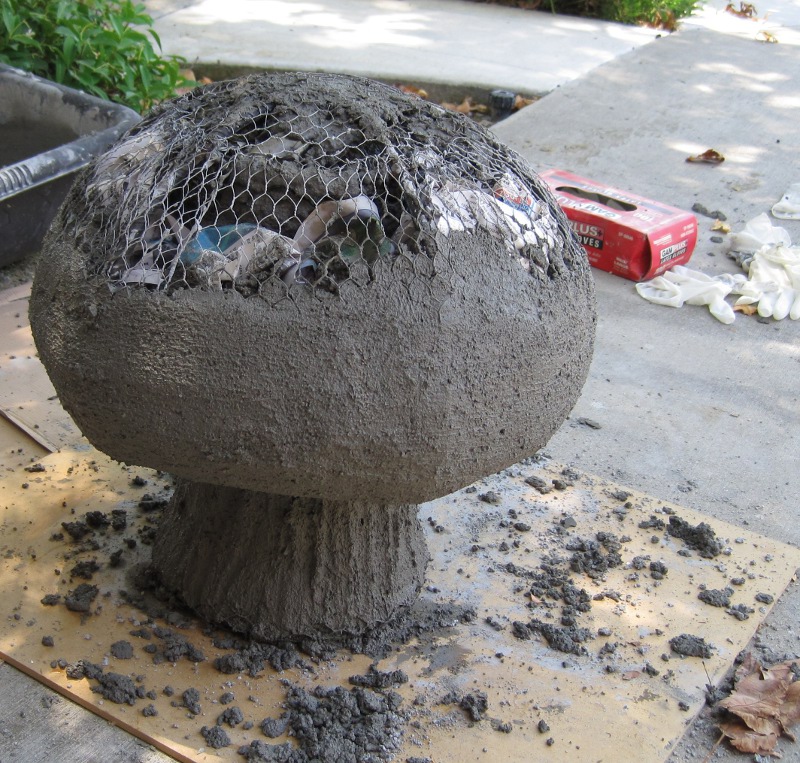
More of the half-finished mushroom cap with ridges on the stalk.
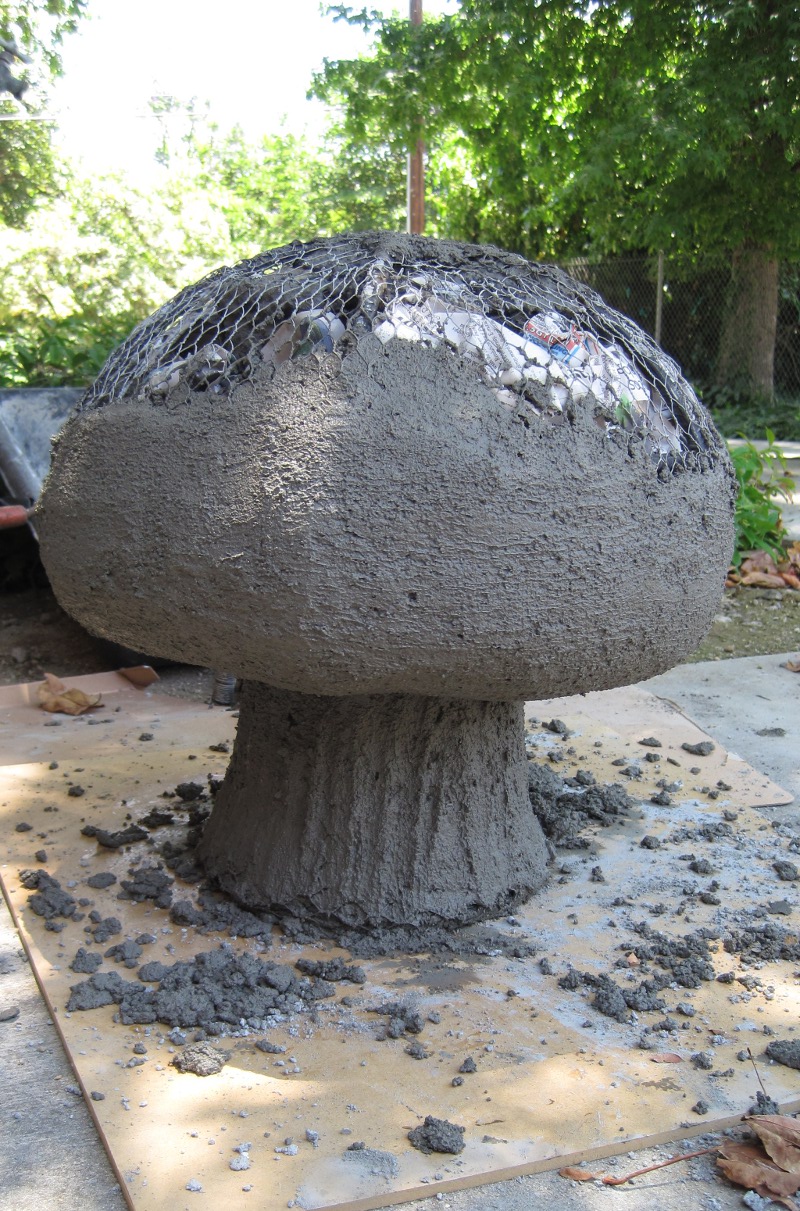
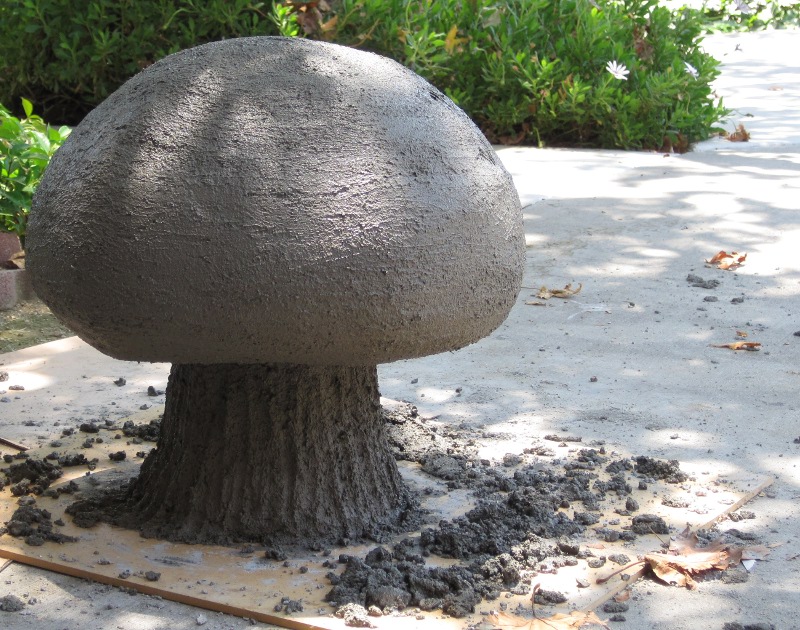
Here I finished applying the concrete to the entire outside of the mushroom. You can see the five sided structure showing through a bit, where it is flat between the ribs. If I were to do this again I might cut the rings and weld them inline with the ribs, just so it would be more perfectly round.
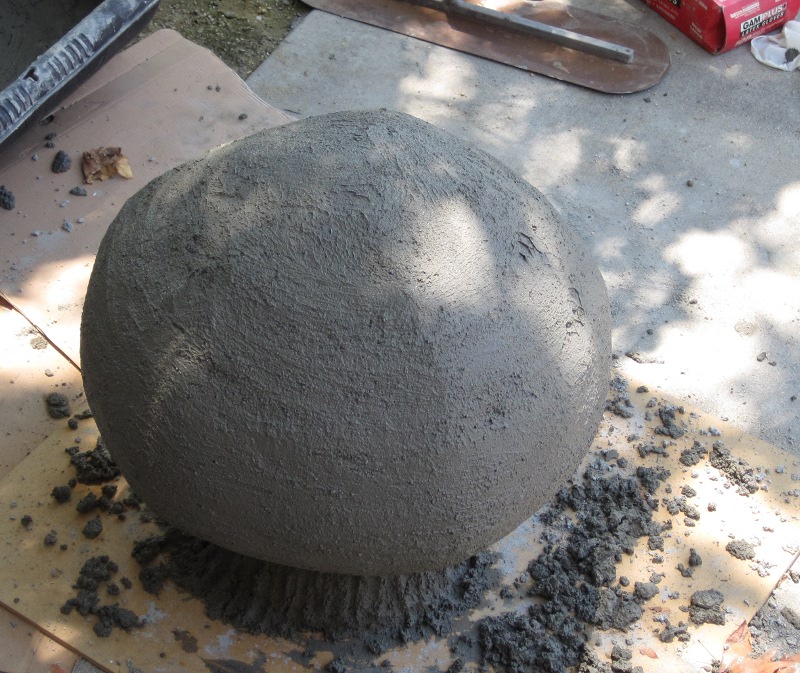
And a side view of the concrete mushroom. You can see that I've also gone back and finished the base, made it a little wider.
Now we're past the structural steps. From this point on it's about cosmetics. First, I took some time to add an extra coat of plaster to the cap, and tried to round out the flats. I also wanted to add some bumps to the top, so I put a few of these little lumps of cement on. They're just stuck on the outside, so they can break off pretty easily, but that hasn't been a problem yet.
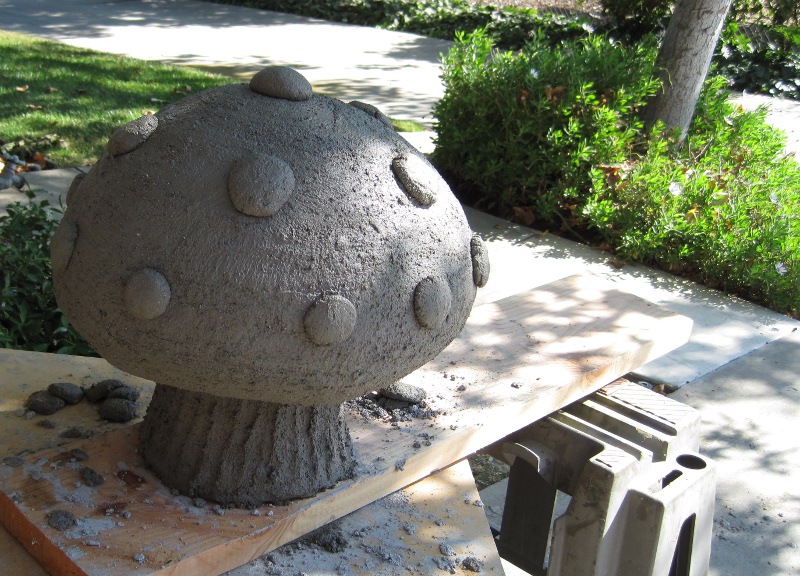
Another view of mushroom with the lumps on the cap. This is the final form, the sculpting is done. This is the only picture where you can see up under the edge of the cap. It's recessed a decent ways. I was considering adding gills, but ultimately decided the extra work wasn't worth it, since you probably would rarely see them, if ever.
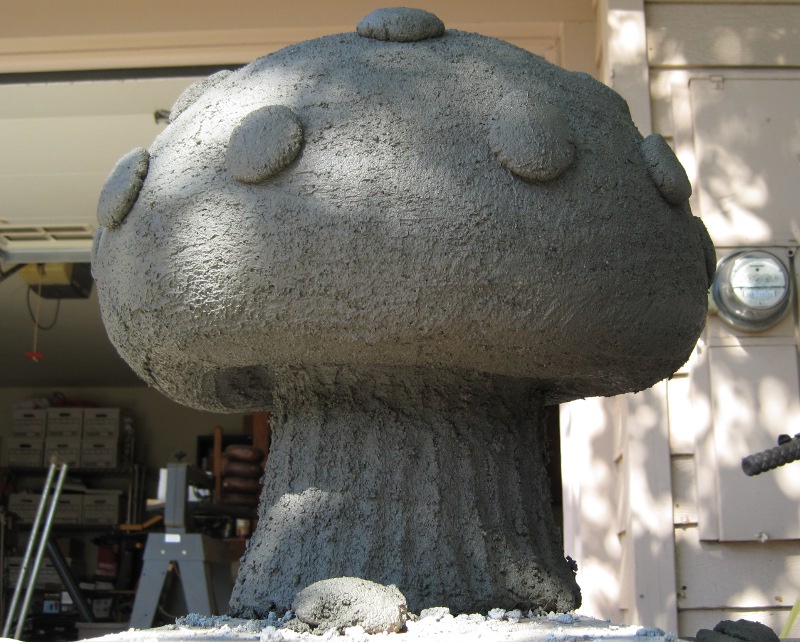
When all the concrete was on I put the whole thing under a wet towel and let it cure for about a week. Keeping the concrete damp at this stage really helps it to set up hard. Even with the hollow cap, this must weigh around seventy pounds.
After the concrete was sufficiently cured, I dyed it using an acid based concrete stain. I actually got a whole kit, but ended up using only a few of the colors. I was hoping the color would penetrate further in, but as you can see from the scuffs it seems to stop right below the surface.
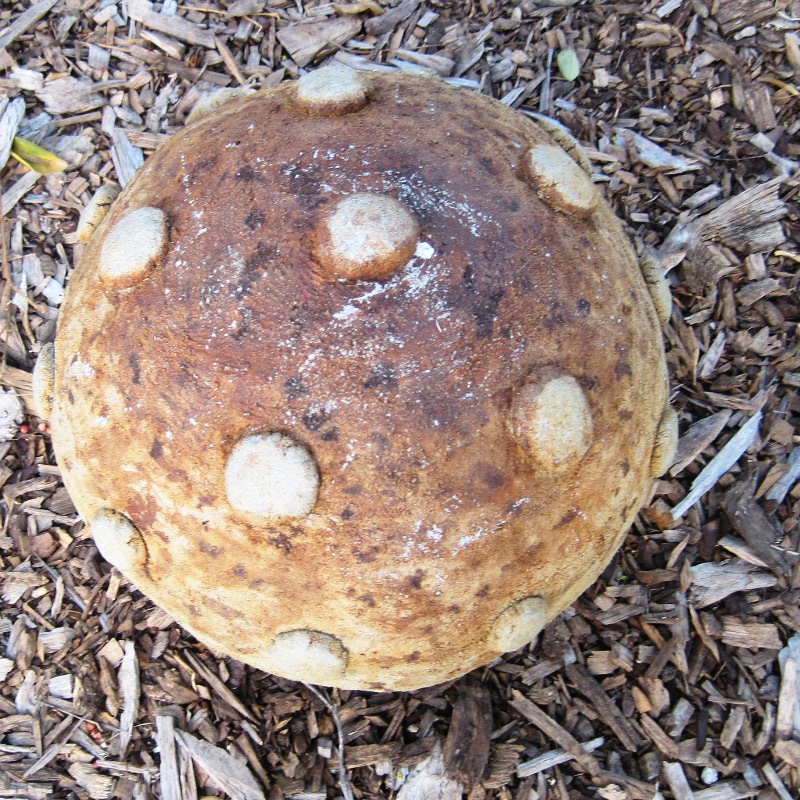
And here it is, sitting in the yard! I don't think anyone would mistake it for a real mushroom, but it turned out alright!
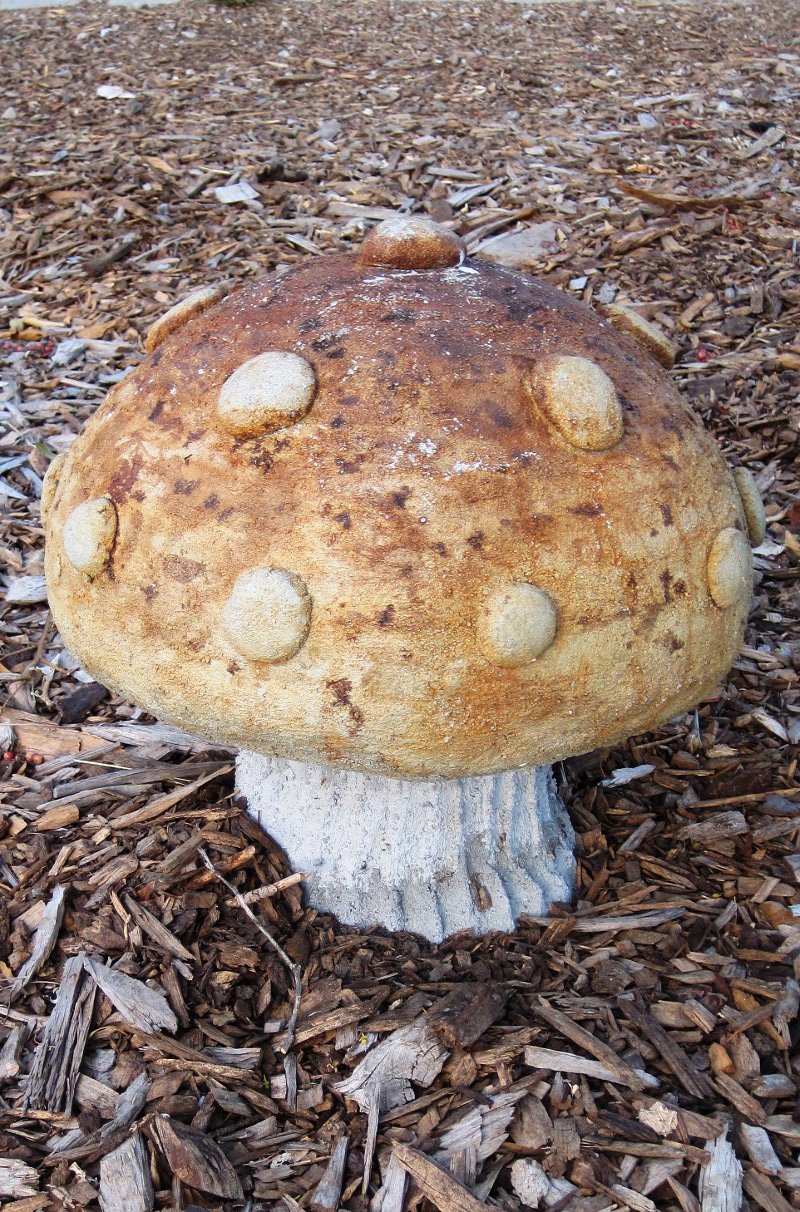
I entered the mushroom in the county fair, but it didn't win any awards. I guess my focus was a bit heavy on durability, at the expense of looks. During the process I was asked by a few people if I would consider selling these concrete mushrooms. At the time my response was, "We'll see how this one turns out". I haven't re-visited it since then, but if you're interested drop me a line. I can also make 3d models of armatures, if you want to do the construction yourself. It takes a lot of labor, but I don't worry about it breaking in half if I drop it the way normal garden ornaments will. I don't think I could break it if I wanted to... at least, not without a sledge hammer.
I gave it to my mother-in-law, who has even more kids than I do, and it's survived the past 10+ years quite well! I'll try to get some photos next time I'm visiting.